You've scrubbed the shower grout, sprayed bleach into the corners, and watched the dark staining return before the bathroom has even had time to feel clean again. In Los Angeles homes, that pattern usually points to more than an unattractive surface. It points to persistent moisture, incomplete drying, or water reaching materials behind the visible tile assembly.
That's why black mold on bathroom tiles should be approached as a testing and moisture-source question first, and a cleaning question second. A small area on sound ceramic or porcelain tile may be suitable for careful DIY cleaning. Recurring grout staining, musty odor, soft joints, damaged caulk, or evidence of water behind the shower calls for inspection, moisture mapping, and, when useful, laboratory sampling. Testing won't decide every repair for you, but it can show whether you're looking at surface growth, hidden contamination, or a building condition that needs correction.
Table of Contents
- Why Bathroom Tile Systems Are Mold Hot Spots
- What That Black Growth on Tile Usually Is
- Safe DIY Cleaning for Surface Mold on Bathroom Tile
- When Recurring Black Grout Means a Hidden Moisture Problem
- What a Professional Mold Inspection and Testing Visit Covers
- Choosing Between DIY Cleaning, Testing, and Professional Remediation
- Preventing Black Mold on Bathroom Tiles and Next Steps in Los Angeles
Why Bathroom Tile Systems Are Mold Hot Spots
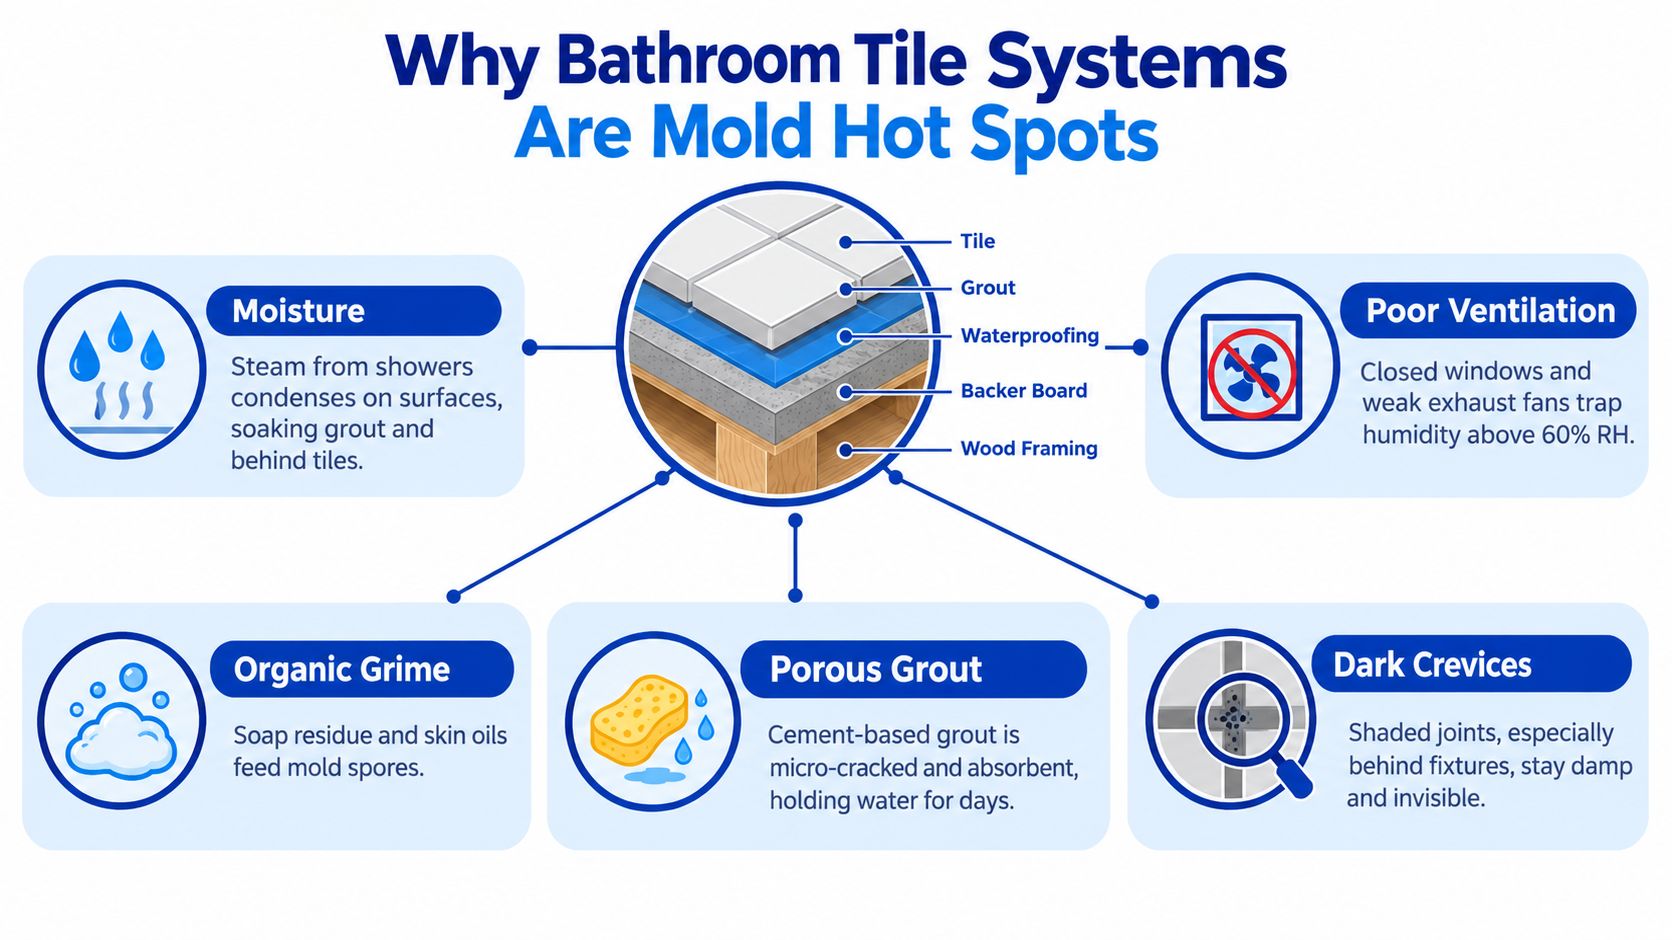
A typical Los Angeles bathroom can create the exact conditions mold needs. Steam lingers after a shower, the window stays shut, and the exhaust fan may move little air. Within weeks, grout lines darken, silicone corners develop black beads, and the bottom edge of the tile remains damp even though the tile face looks dry.
The tile itself is generally a hard, inert surface. The vulnerable parts are the grout, caulk, thinset, backer materials, and surrounding painted wall surfaces. Cement-based grout absorbs water. Caulk seams can separate from the tub or tile. Organic residues from soap, shampoo, and skin oils collect in joints. If water penetrates a failed seam, the backer board, drywall, or framing behind the tile may stay wet long after the bathroom appears normal.
Health Canada's guidance on moisture and mould explains that indoor mould typically grows when moisture is present. It recommends maintaining relative humidity between 30% and 50% and running a bathroom exhaust fan for at least 30 minutes after a shower or bath. The same guidance recommends prompt repair of cracked tiles, grout, and caulking around tubs and showers because those defects trap moisture and support mould growth.
Where the moisture hides
The highest-risk locations are predictable:
- Showerhead and valve connections: Small leaks can wet the wall cavity without producing an obvious puddle.
- Tub-to-tile corners: Failed caulk lets splash water move behind the finished surface.
- Grout lines and tile edges: These joints absorb and retain water more readily than glazed tile faces.
- Shower-door tracks: Missing drip edges and blocked drainage leave standing water along the bottom edge.
- Cold morning surfaces: Condensation can form when damp air meets cooler grout and silicone.
A bathroom-focused review notes that shower mold grows fastest on silicone caulk, inside grout lines, and along the lower edge of tile where water pools. The practical conclusion is straightforward. If the same black discoloration returns, stop treating the stain as proof that you need a stronger chemical. Treat it as evidence that someone needs to locate and measure the moisture.
What That Black Growth on Tile Usually Is
Dark staining doesn't identify a mold species. Black doesn't automatically mean Stachybotrys chartarum, and visual inspection alone can't reliably distinguish mold from soap residue, mineral staining, or biofilm.
Cladosporium commonly appears as a dark green, brown, or black surface stain on grout, shower tracks, and damp bathroom joints. Aspergillus niger may appear as powdery black spotting, sometimes with a lighter edge. Stachybotrys is a different concern because it generally requires sustained moisture involving cellulose-rich materials such as wet gypsum or other affected building materials, rather than a damp glazed tile face.
Species identification matters, but not because a name automatically determines a repair order. A tape-lift or swab sample can help identify material directly from a visible stain. Air sampling can help evaluate whether the bathroom has an unusual airborne mold condition, particularly when growth may be hidden or the odor and moisture evidence extend beyond the tile.
| Appearance | Likely cause | Surface or substrate? | Implication |
|---|---|---|---|
| Dark, irregular staining in grout or silicone | Cladosporium or another common moisture-associated mold | Often surface-level, but grout and caulk can retain growth | Investigate moisture, then determine whether cleaning or material evaluation is appropriate |
| Powdery black dots with a pale fringe | Aspergillus niger or similar dark mold | Surface or porous joint | A laboratory sample can separate mold from residue and support a focused assessment |
| Dark growth extending onto wet drywall or cellulose-based material | Possible Stachybotrys or another indoor mold condition | More likely tied to a wet substrate | Prioritize source correction, containment planning, and professional evaluation |
| Chalky, gritty, or greasy black-brown film | Soap scum, hard-water minerals, iron, manganese, or biofilm | Surface look-alike | Cleaning alone may remove some residue, while sampling can resolve uncertainty |
| Staining that returns after repeated cleaning | Active moisture, trapped contamination, or failed detailing | Surface and potentially behind tile | Moisture mapping and inspection are more useful than another round of bleach |
A bathroom mold guide notes that tile and grout discoloration is often associated with Cladosporium or Aspergillus niger rather than the toxic-mold narrative. The testing question should therefore be specific: Is this visible surface growth, and is the assembly staying wet behind the finished surface?
Safe DIY Cleaning for Surface Mold on Bathroom Tile
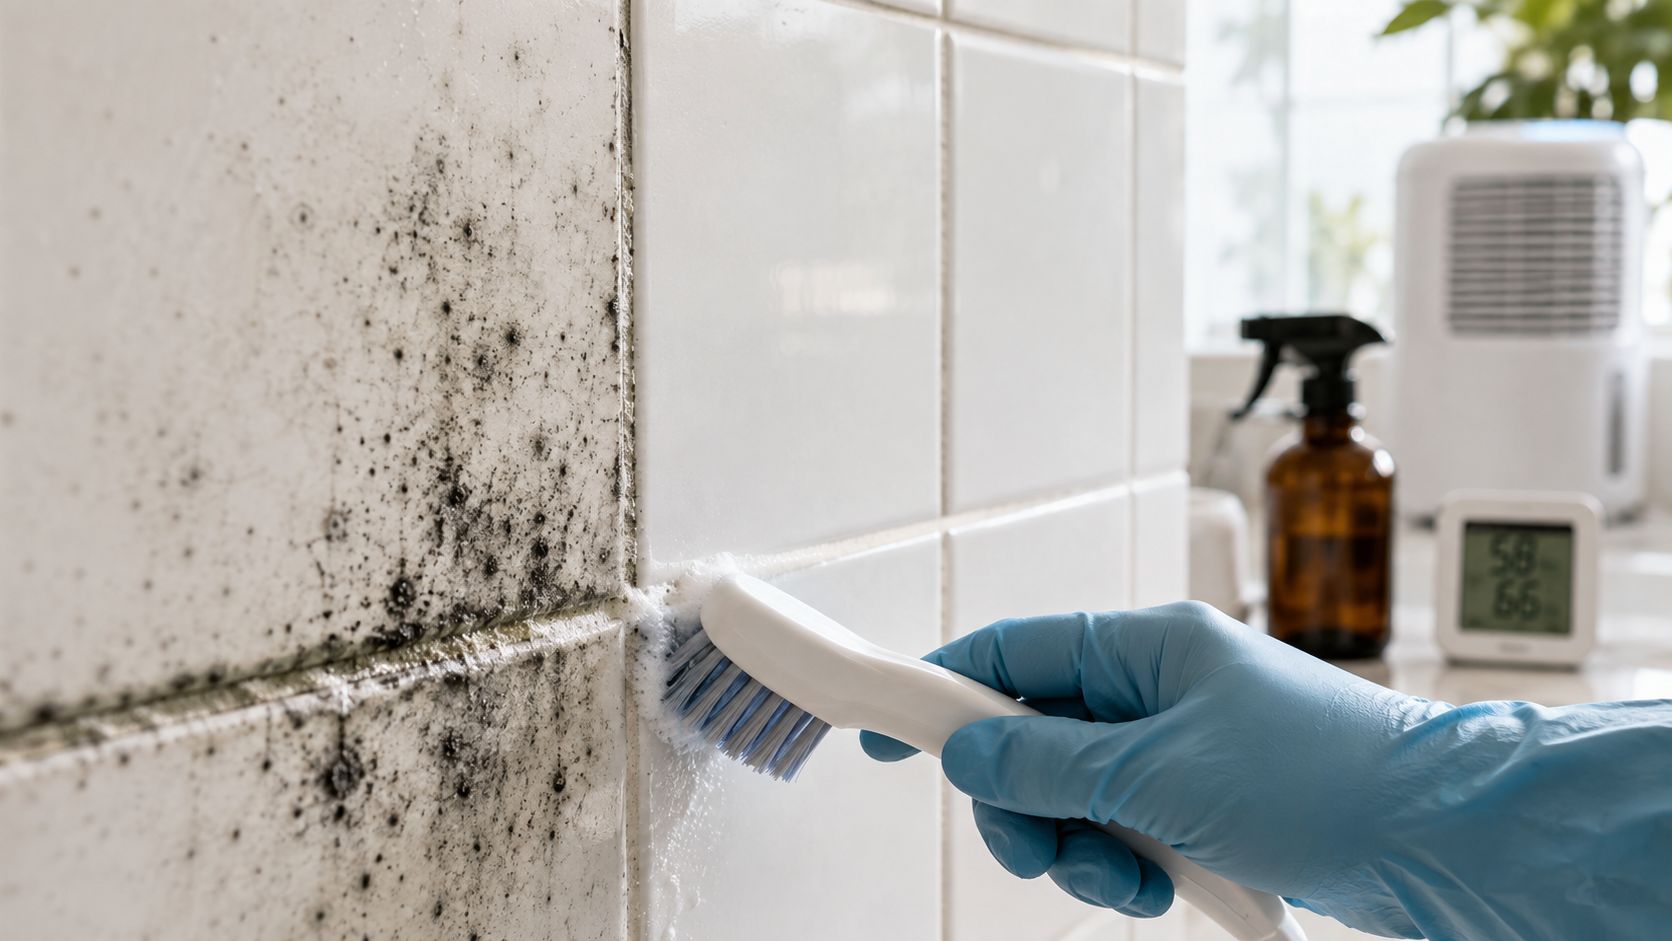
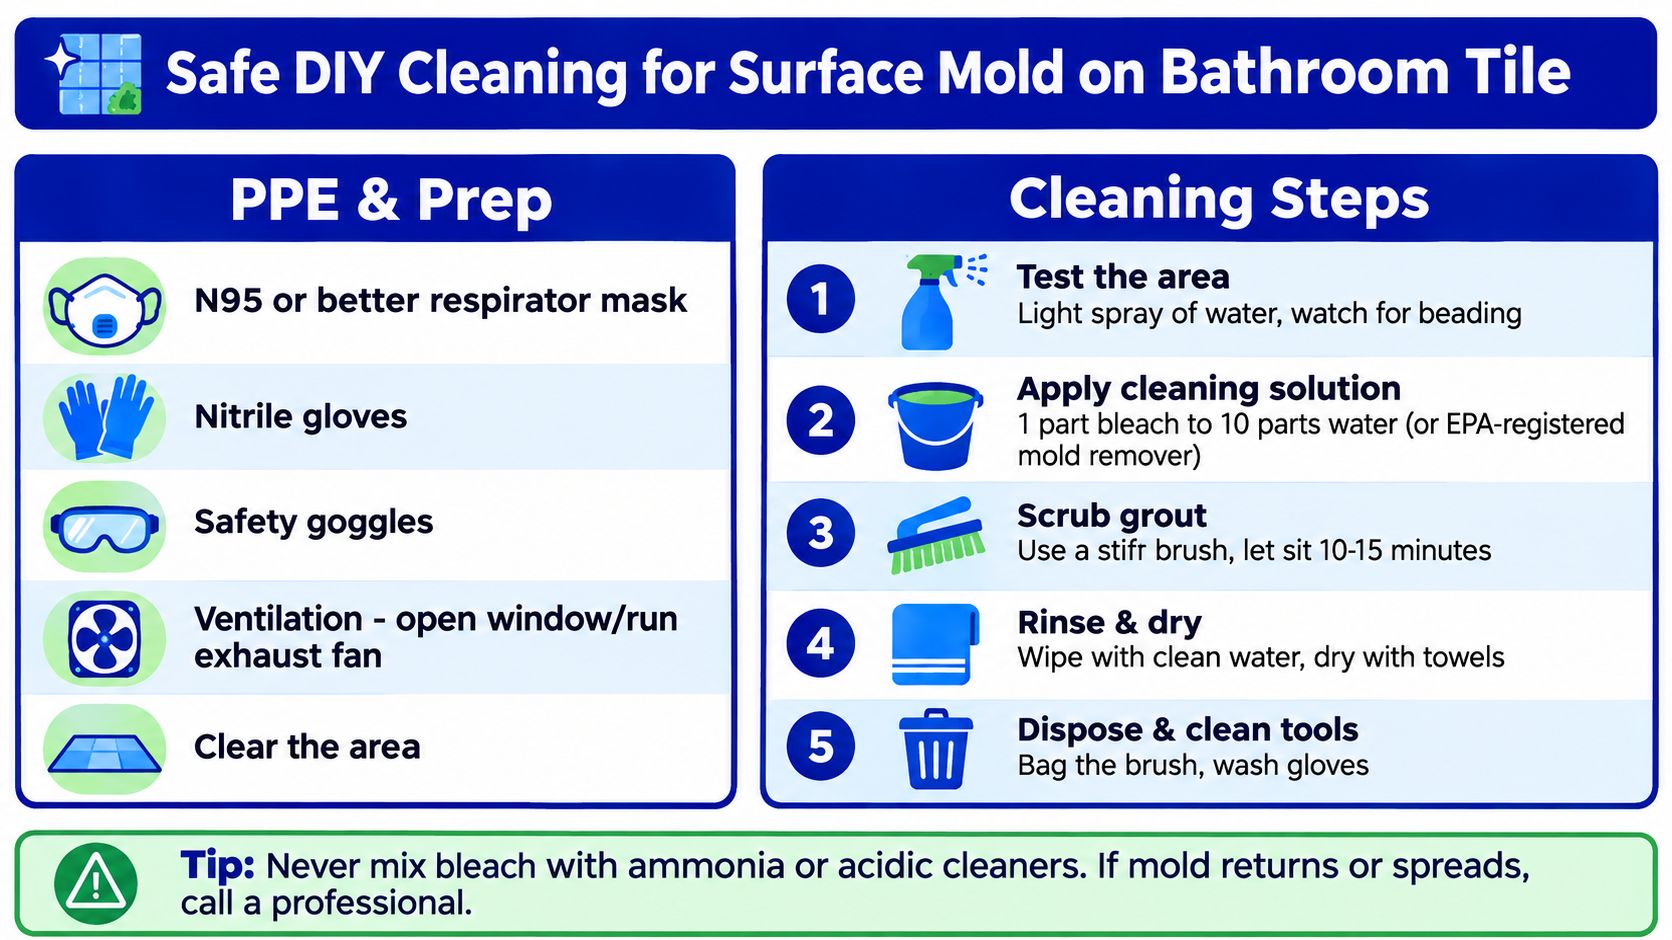
DIY cleaning makes sense when the affected area is clearly limited to hard tile or grout, the joints are sound, there's no persistent odor, and staining hasn't repeatedly returned. The EPA's hard-surface protocol is simple: scrub with detergent and water, then dry completely. The point is physical removal, not merely changing the color of the stain.
Prepare the room before touching the growth
Use gloves, eye protection, long sleeves, and respiratory protection appropriate to the task. An N95 may be used for limited household work, while a half-mask respirator with P100 filters provides a different level of protection when properly fitted. People with respiratory conditions or heightened sensitivity should avoid performing the cleaning themselves.
Open a window if the bathroom has one and run the exhaust fan. Keep the bathroom door closed to reduce migration into bedrooms and hallways, while allowing the exhaust system to move air outdoors. Don't dry-scrape, sand, or aggressively disturb a surface before you've considered how particles may spread.
Scrub, rinse, and remove the material
For a small surface-only area:
- Pre-wet the area with a detergent solution. Dampening the surface helps limit unnecessary airborne disturbance.
- Work the grout lines and tile faces with a stiff grout brush. Focus on corners, caulk seams, and tile edges where residue accumulates.
- Rinse with clean water. Remove loosened material instead of allowing it to dry back onto the surface.
- Dry the assembly thoroughly. Use towels, airflow, and dehumidification where available.
The EPA specifically recommends detergent and water for visible mold on hard surfaces and emphasizes complete drying and correction of leaks. EPA mold cleanup guidance also makes the critical distinction that biocides such as bleach don't replace mechanical removal. Bleach may lighten a stain while growth remains in grout pores or caulk seams.
Never mix bleach with ammonia, acids, vinegar, or other cleaning products. Product labels control safe use, and a chemical reaction can create hazardous fumes.
Know when DIY stops being sensible
Don't keep scrubbing if:
- The affected area is larger than 10 contiguous square feet. EPA-aligned remediation guidance uses this threshold for shifting from ordinary cleaning toward formal containment and more controlled work. See the EPA remediation guidance for larger mold problems.
- The stain returns after cleaning and drying. Recurrence suggests that moisture or contamination remains.
- The grout is soft, powdery, cracked, or missing. The problem may involve the substrate or waterproofing assembly.
- The odor persists. A musty odor after visible cleaning can justify moisture investigation and targeted sampling.
DIY cleaning can remove a surface stain. It can't verify the condition behind the tile.
When Recurring Black Grout Means a Hidden Moisture Problem
The reflex is familiar: scrub harder, apply bleach, remove the old caulk, and reseal the joint. That approach fails when the water source remains active.
A grout line that darkens again within a short period deserves attention. So does a caulk seam with pinhole gaps, grout that crushes under light pressure, or an earthy odor that persists after cleaning. These findings suggest that water may be moving through a failed corner, shower pan liner, tub transition, supply connection, or damaged waterproofing detail.
Practical rule: Recurring black grout is a moisture diagnostic. It isn't evidence that you need a more aggressive disinfectant.
Los Angeles bathrooms present several recurring patterns. A failed shower pan can wet the assembly beneath the tile. A poorly detailed tub-to-wall transition can direct splash water behind the surround. A missing corner treatment can allow water into a joint that looks intact from a standing position. On ground-floor bathrooms, moisture from the slab can also contribute to damp conditions around unsealed joints, although inspection is needed to identify the actual source.
The tile surface may be the least important part of the investigation. A professional looks for temperature anomalies, high material moisture, failed joints, and water movement into adjacent drywall, baseboards, flooring, or framing. If the substrate remains wet, cleaning and resealing only conceal the problem temporarily.
For homeowners dealing with water-related staining, this guide to checking for mold after water damage offers useful context on why visible growth should be evaluated alongside the original moisture event. The same principle applies to a shower that repeatedly develops black discoloration. Find the source before disturbing or replacing the assembly.
What a Professional Mold Inspection and Testing Visit Covers
A professional mold inspection isn't a cleaning estimate with laboratory language added afterward. It should connect what the inspector sees, what instruments measure, what samples identify, and what the report recommends next.
The inspection starts with conditions, not samples
The visit begins with a visual and olfactory walkthrough. The inspector evaluates the shower, tub surround, ceiling, adjacent walls, baseboards, flooring, vanity, and the room below when access allows. Grout and caulk may be probed carefully for deterioration, while loose or hollow-sounding tile can indicate a problem that deserves further investigation.
Infrared thermography can help identify temperature anomalies associated with wet building materials. It doesn't prove mold by itself. It helps direct moisture-meter readings and sampling toward locations where the assembly behaves differently from surrounding areas.
Pin and pinless moisture meters may be used on grout lines, tub surrounds, drywall, baseboards, and nearby flooring. The objective is to determine whether moisture is limited to the visible joint or extends into surrounding materials.
Sampling answers different questions
A professional may recommend one or more of the following:
- Tape-lift sampling: Collects material directly from a stained grout line, tile edge, or caulk seam for laboratory identification.
- Swab sampling: Provides a low-impact collection method for a suspect growth area, especially where a tape lift is impractical.
- Bulk sampling: Uses a small piece of crumbled grout or affected material when deeper growth or material composition needs evaluation.
- Spore-trap air sampling: Assesses airborne mold particles in the bathroom and is commonly paired with an outdoor control sample for comparison.
Indoor air investigations commonly use one indoor sample from the affected area and one outdoor baseline sample. Additional samples may be appropriate when the affected area is very large, multiple building levels are involved, or the investigation requires broader comparison. Professional mold testing guidance describes the role of indoor and outdoor comparisons in evaluating airborne conditions.
Surface confirmation through tape-lift or swab sampling is also a standard low-impact method for visible mold on hard surfaces, as described in professional mold inspection sampling guidance.
The report should support a decision
Laboratory analysis can identify the types of mold collected and report airborne findings in the context of the sampled locations. The written report should tie those results to observed moisture readings, visible conditions, and a practical scope for qualified contractors. A positive sample doesn't automatically dictate removal, demolition, or abatement. It gives the property owner and project team better information for deciding what work is justified.
For a broader discussion of how professionals assess and contain bathroom mould, readers can compare the inspection stage with the later work-control stage. Those are different services and shouldn't be confused.
Sampling is most useful before demolition or tile removal, not after the walls have already been opened. Pre-work data can help determine where containment belongs and which materials require attention. Homeowners should also understand why home mold test kits may not be reliable for answering questions about hidden moisture, airborne conditions, or the scope of a water-damaged assembly.
Choosing Between DIY Cleaning, Testing, and Professional Remediation
The decision depends on more than how black the stain looks. Area, recurrence, odor, material condition, and the location of the growth all matter.
A small stain on intact tile is a different problem from black grout that returns after every cleaning. A bathroom with visible growth on drywall or ceiling is different again. The EPA-aligned benchmark for larger affected areas is 10 contiguous square feet, but recurrence and hidden moisture can justify professional testing even when the visible patch is smaller.
| Signal | Clean yourself | Test first | Hire remediation |
|---|---|---|---|
| Small area on intact tile or grout | Appropriate when the growth is clearly surface-level and doesn't return | Consider testing if the material identity matters for a transaction or dispute | Not the first step |
| Area larger than 10 contiguous square feet | Not appropriate as a routine DIY project | Arrange professional inspection and sampling | Qualified remediation may follow the assessment |
| Staining returns after cleaning | Stop repeating the same cleaning cycle | Use moisture mapping and targeted sampling | Consider remediation only after the moisture and contamination scope are established |
| Persistent musty odor | Don't rely on surface cleaning alone | Inspect concealed spaces and compare air conditions when appropriate | May be needed if hidden materials are affected |
| Growth on drywall, insulation, framing, or other porous materials | DIY cleaning is usually inadequate | Test and document before disturbance | Qualified contractors may need to control and address affected materials |
| Real estate, insurance, or construction dispute | Keep ordinary cleaning records | Obtain independent inspection and laboratory documentation | Let the documented scope guide the contractor |
The commonly used 10-square-foot threshold comes from EPA-aligned remediation practice, while the decision to test may arise earlier when a leak, recurring staining, or hidden damage is present. Health concerns also deserve a measured response. Don't diagnose illness from a stain, but don't ignore new respiratory complaints either. Pause disturbance and consult the appropriate professionals.
For property owners documenting signs of water damage in your house, independent environmental testing can provide useful records separate from the contractor performing repairs. That separation matters in insurance claims, property transactions, and projects where the owner needs defensible documentation.
Testing doesn't equal remediation. Results help qualified professionals determine whether source repair, targeted cleaning, material replacement, containment, or additional investigation is appropriate. Professional mold remediation practices should be considered only after the environmental conditions and project scope are understood.
Decision rule: In Los Angeles, test before tearing out tile when staining recurs or moisture may be behind the assembly. Replacing a shower without identifying the failed detail can reproduce the same problem.
Preventing Black Mold on Bathroom Tiles and Next Steps in Los Angeles
Prevention is a control loop, not a single product. Reduce moisture, move humid air outdoors, repair defects promptly, verify that materials dry, and reassess the bathroom after leaks or construction work.
Health Canada recommends keeping relative humidity between 30% and 50% and running the exhaust fan for at least 30 minutes after bathing. That recommendation is more defensible than relying on a vague promise that a “mold-resistant” caulk will solve the problem. A functioning fan, clean exhaust grille, and an airflow path matter more than the label on a bottle.
A practical bathroom control plan
- Ventilate after every shower: Run the exhaust fan for the recommended post-shower period and use a window when practical.
- Measure humidity: A hygrometer can show whether the bathroom remains damp after use. Persistent readings above the recommended range justify investigating ventilation and moisture sources.
- Dry the wettest surfaces: Wipe shower-door tracks, corners, tub edges, and pooled water along the bottom tile edge.
- Inspect joints: Look for cracked grout, separated caulk, pinholes, loose tile, and staining that moves beyond the shower.
- Respond to leaks promptly: A supply-line drip, slab leak, or failed shower detail can keep the assembly wet even when the surface is routinely cleaned.
- Schedule a moisture check after water damage: A bathroom that has experienced a leak should be evaluated before staining becomes the only visible clue.
Marine-layer mornings and older Westside homes with weak or nonfunctioning exhaust fans deserve particular attention. The same applies to apartment buildings, hotels, schools, healthcare facilities, and commercial properties where repeated bathroom use can make moisture control a building-management issue rather than a housekeeping issue.
Frequently asked questions
What does tile-area mold testing cost?
A responsible provider should quote the inspection and sampling scope after learning the bathroom size, visible conditions, suspected water source, access requirements, and documentation needs. There isn't a universal price that can be stated accurately without those details. Ask whether the fee includes moisture mapping, sampling, independent laboratory analysis, and a written report.
How quickly can testing be booked after a water event?
Availability depends on location, current scheduling, the size of the event, and whether the property is residential or commercial. Contact an environmental testing company as soon as practical after the area is stabilized, especially if materials remain wet, odors persist, or demolition is being planned.
Sensitive Environmental provides mold inspections, moisture-related mold testing, indoor air quality testing, and broader environmental assessments for homes, commercial properties, and construction projects across Los Angeles County and Southern California. Contact the team before removing bathroom tile if you need documented sampling, laboratory analysis, or a defensible assessment of recurring black mold bathroom tiles.
Visit Sensitive Environmental to discuss a bathroom-focused mold inspection, moisture investigation, surface sampling, or indoor air quality assessment in Los Angeles and Southern California. Their environmental testing reports can help homeowners, property managers, contractors, insurers, and real estate professionals determine the next appropriate step before cleaning, demolition, or repair begins.